Upload the image to the prompt chat
Upload the image to the prompt chat
Simply upload them in the chat and explain to Lovable’s Agent where and how you’d like them to appear in your project. For example:
Replace the logo in navbar with this image
Replace it from the preview toolbar
Replace it from the preview toolbar
You can replace an existing image directly using the preview toolbar:
Using an external image URL
Using an external image URL
One way to add images to your project is by referencing an image from an external URL. This method allows you to use images hosted on external platforms like Unsplash, Imgur, or any other image-hosting service. Be mindful of use copyrights!Here’s how to prompt Lovable to use an external image:
Using images from your GitHub public directory
Using images from your GitHub public directory
Another method to add images to your Lovable project is by using images uploaded to the To help you better understand how to integrate images using the methods outlined above, we have a project you can explore: Lovable Project Example. In this project, you can see the actual prompts and how each method works in practice.Additionally, here’s a public GitHub repository that includes the commits, uploaded images, and full implementation details. You can view the repository here: GitHub: Adding Images Example.Feel free to explore the project and repository to deepen your understanding and improve your implementation skills.
public directory of your connected GitHub repository. Here’s how you can do it:Connect your GitHub repository
Ensure your project is connected to your GitHub repo. Here’s how to connect your repo.
Locate the public folder
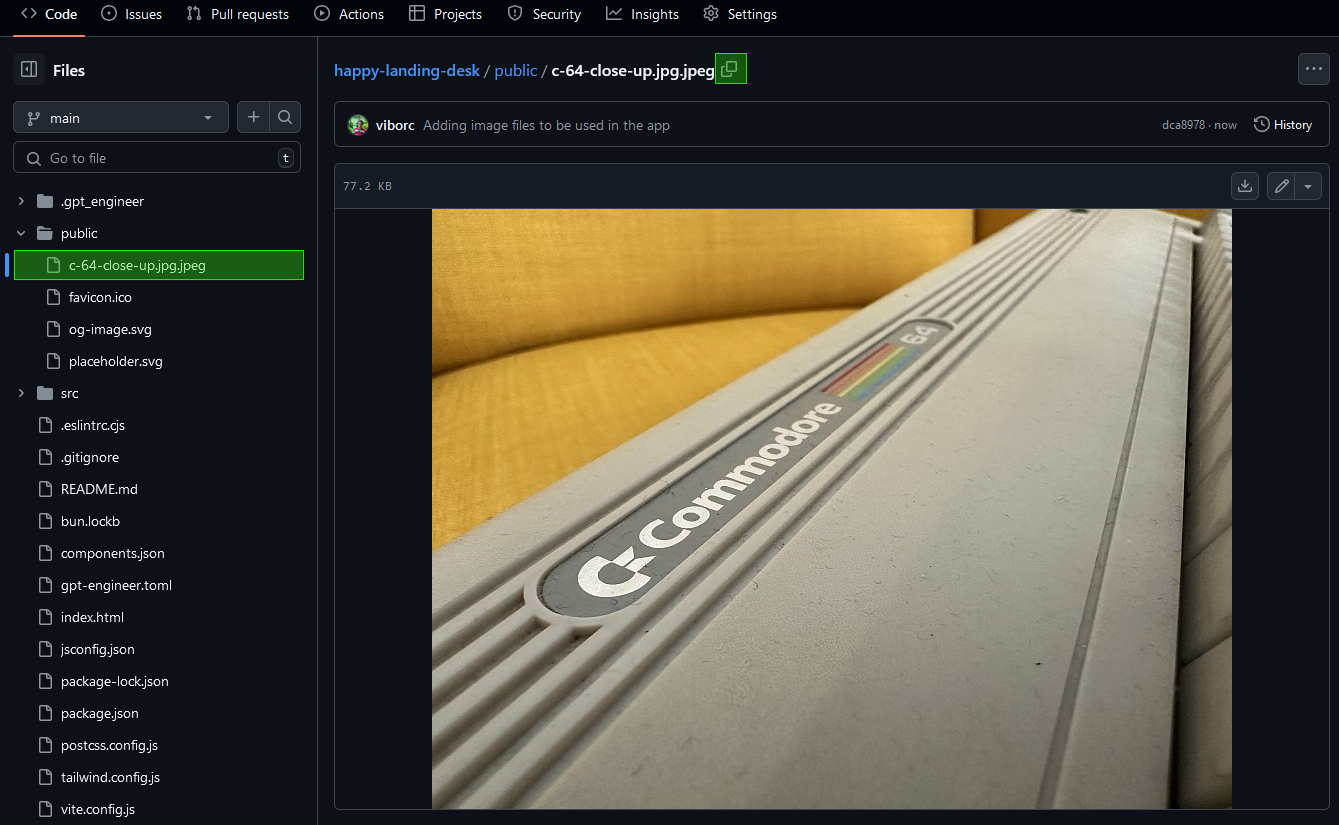
Inside your GitHub repository, navigate to the
public directory. This folder is typically used for hosting assets like images that can be referenced in your project.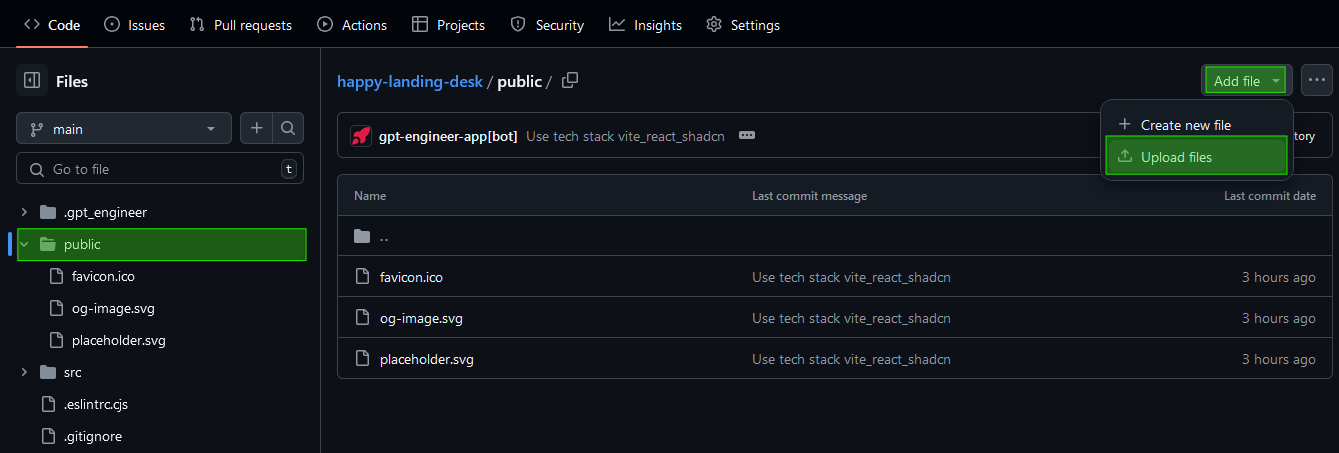
Upload an image
The next step is to transfer your image to your repo:
- Drag and drop the image into the public folder, or
- Click on the “choose your files” link to browse and select the image file.
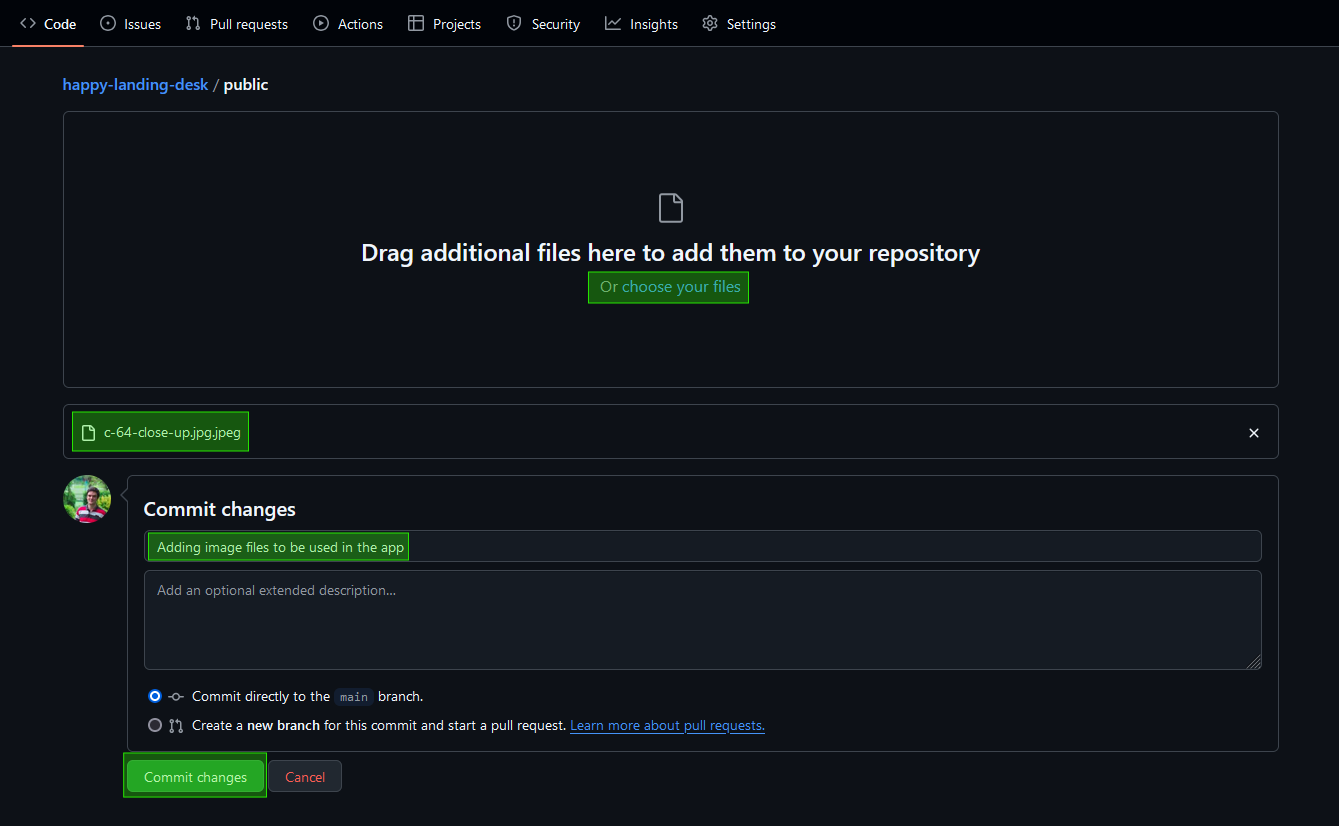
Commit the changes
After selecting your image, write a simple commit message (e.g., “Adding image files to be used in the app”) and click “Commit changes” to save the file to your repo.
Get the image path
Once the file is uploaded, select it and then click on the copy icon next to the file name to copy the image’s path. This path will be used in your Lovable prompt.